WordPress settings
This is the first place to begin making adjustments in order to improve the way your new site works. You can find a link at the bottom of the left hand menu (or in more recent versions of WordPress a handy set of Getting Started links appear on the admin home page).
Let’s look at setting the tagline.

The tagline is a short piece of text that appears under your site title on the front-end of your website. This defaults to “Just another WordPress site”, but let’s try changing this and see what effect it has on our new site. Either click on the link under Basic Settings in above, or on the left hand menu click on “Settings” and then “General”.
We’ve changed the text in the tagline field to “Test. Train. Excel” and clicked Save Changes at the foot of the page. This has rendered on the front end of the site.
Explore the rest of the Settings menu sub-pages and you will find many ways in which you can start to break away from the generic setup, and move towards a site that is honed any way you want it.
Theme Selection
In WordPress terms a theme is a collection of files that control the appearance of your website. These files are called template files, and between them they utilise the web programming and markup languages (we have covered elsewhere in this course) to dress up the content you enter through the admin area and present everything in a consistent manner. The simplest theme can include just one CSS file for styling and an index file that deals with generating HTML for the browser to read. More complex themes will include templates that control the layout for particular types of content and specific pages such as search results. The process of theme customisation can get very complicated indeed but in turn enables very sophisticated bespoke websites to be built. For now, let’s keep things simple.
Choosing and installing a theme
The first method that we use to change the look of our website is by installing a new theme. WordPress.org plays host to hundreds of themes that can be installed on your website with one click, instantly transforming the entire site.
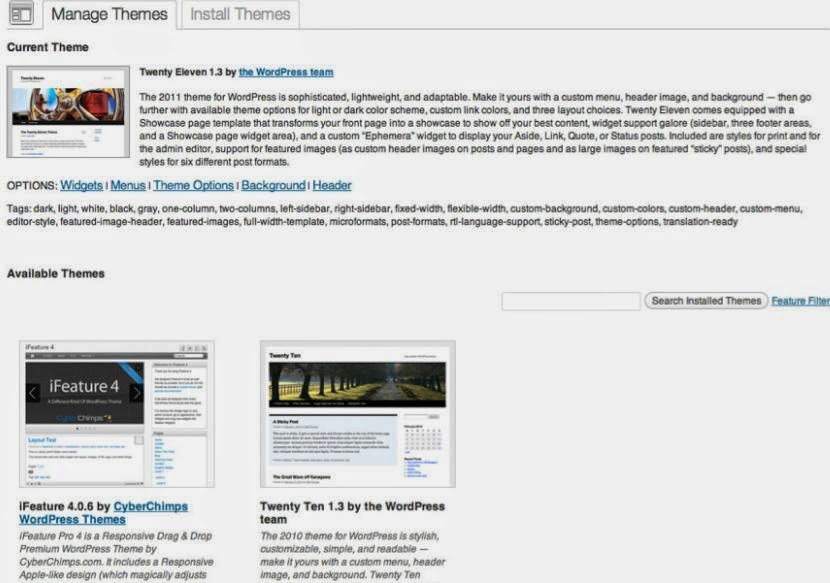
You needn’t go directly to WordPress.org, since you are able to search their theme repository from within your own WordPress installation. To do so, go to the left hand menu in the admin area and click on Appearance. This takes you to the Manage Themes page where you see an “Add Themes” tab at the top of the page. Clicking this takes you to a page where you can search for themes by various criteria or keyword. You can preview themes before downloading and applying them to your site. Once you have found a theme you like follow the links to Install and Activate the theme. Have a look at your site to see the changes in place.
To switch back or for more theme changes, you can click “Appearance” again and choose between installed themes. It’s perfectly safe to play around with installing different themes, since the earlier themes remain for you to switch back to if you so decide.
Customising an existing theme
While few professional websites that use WordPress adopt wholesale a pre-fabricated theme, for the rest of us that’s a great place to start experimenting. Besides, it’s entirely possible (and fun) to modify an installed
theme beyond all recognition and achieve stunning, bespoke results. To make things easier we suggest sticking with the Twenty Eleven theme, and make changes to the appearance menu to begin with, until you are a little more familiar with the interface. Let’s begin by experimenting with the header image.
The Twenty Eleven theme includes many built-in tools enabling an owner to change and personalize the look and feel of his/her site. You can set a background image or colour for every page, you can create a navigation menu with links to the various pages of the site, and you can determine the overall layout of the site. Not all themes have as many options as Twenty Eleven, and if you’re new to WordPress it’s another reason to stick with this theme as you experiment. Future versions of WordPress will include very similar default theme functionality.

In this example we will have a look at changing the header image. This is the wide image that appears underneath the site title by default. It’s possible to remove completely the image on this page, which might suit many and can make for a visually appealing site, so let’s give it a go.
WordPress allows you to upload images. In this case we’ll use a photograph, and crop it to the size of the header image - all without the use of an external graphics-editing program. It’s all made easy to enable you
achieve great looking results on your site.
As well as providing a great editor for creating page content, WordPress also makes categorizing the content logical and easy. By default there are two options for doing this; these are called Categories and Tags. At first glance they appear to serve similar purposes, but over time it will become apparent that having two separate ways to differentiate posts and pages can come in handy. It is also possible to add more “custom taxonomies”.
Read Next - Introduction on Wordpress - Part 5
No comments:
Post a Comment